Tutorials
When you need someone to be able to make changes on your site, such as updating pages or creating blog posts, you need to grant them permission.
If they have a WOU email address, their WordPress login can be linked to their WOU Portal login, so they don’t have to remember a separate password. If the person doesn’t have a WOU email address, contact Ron or Danielle for help; this tutorial covers WOU people only.
You’ll need their WOU username to do this. Let’s say the person’s email address is “example@wou.edu”. That means their username is “example”. Basically, you’ll check whether they already have a WordPress account; if they do, you’ll grant permissions to that account, and if they don’t, you’ll create it and grant the permissions.
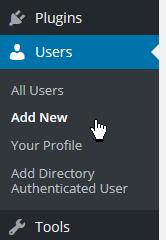
- On your site’s Dashboard, go into the Users menu and click “Add New”.
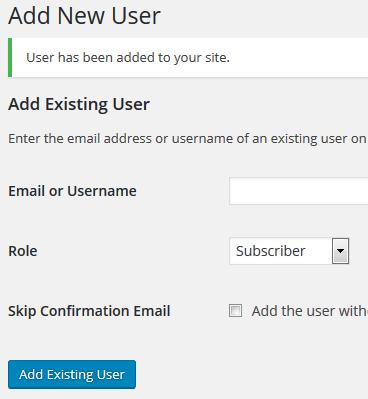
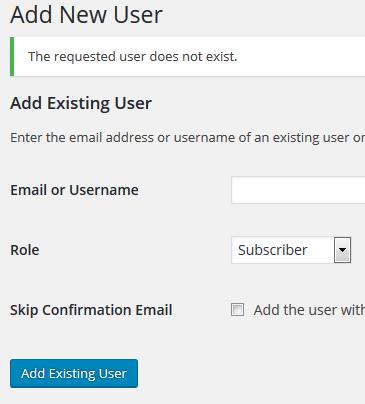
It might look like this: or this:
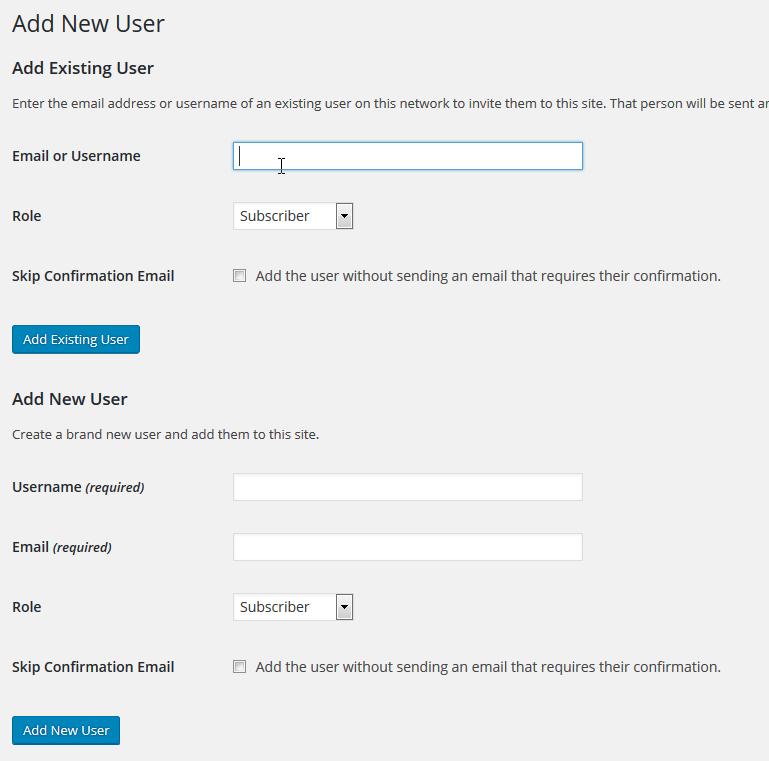
- This is the page you’ll see. It contains two forms; you will only use the top one. Don’t use the bottom one unless instructed by UCS; that form creates an account not linked to a Portal account, which will be more complicated for the owner to use.

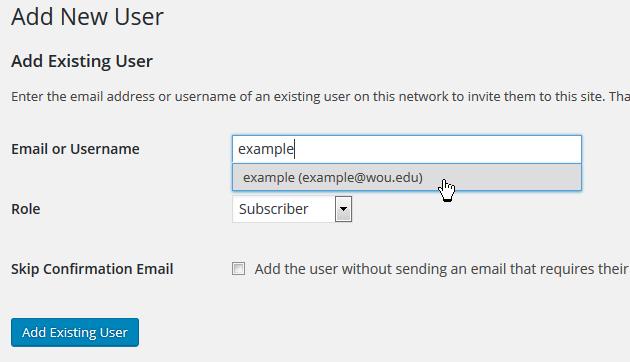
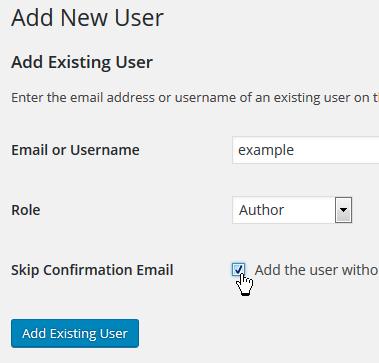
- In the Add Existing User section, type the username. After you stop typing, WordPress will check whether there are any users with similar names. Assuming the user already has a WordPress account, their email address will be displayed below the text box.

- If no email address showed up, the user doesn’t have a WordPress account yet. Go to the separate section below.
- If you did see an email address, they already have a WordPress account. Keep following the instructions from here.
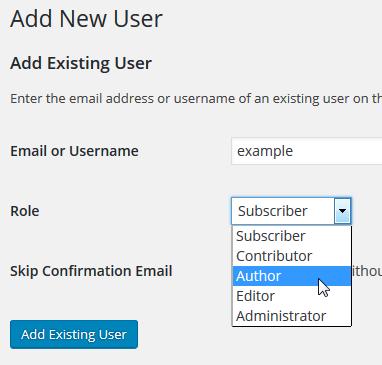
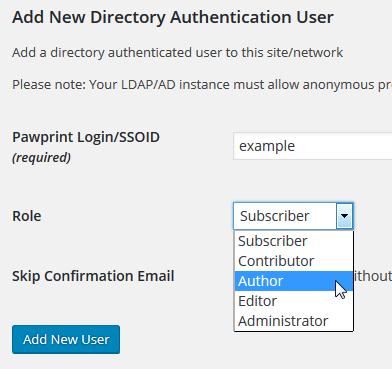
- Next, click the menu to choose what kind of access to give them.
- There’s generally no need to add someone as a Subscriber; it doesn’t give them any real permissions on your site, except possibly to leave comments on blog posts, if you have any of those in your site.
- Choose Contributor if you want them to be able to create new pages and posts, but not publish them unless reviewed by someone with a higher level of access.
- Choose Author if you want them to be able to publish new pages and posts, and edit the ones they have created.
- Choose Editor if you want them to also be able to edit pages and posts created by other people (including by you.)
- Choose Administrator to give them full control of the site, equal to your own.

- If you want, you can check this box to prevent them from getting an automated notification that their access has been granted. This is up to you.

- Click the Add Existing User button. Most likely you’ll see a message saying that the user was added:

- If you see that message, you’re finished. The remaining steps show how to deal with problems that may occur.
- The most common error you might see says that the user didn’t exist. If this happens, you’ll need to create their account.

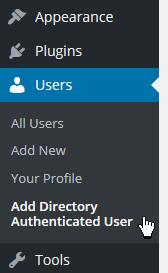
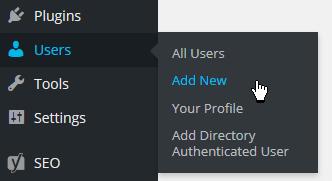
- To create a new account that is linked to their Portal login, don’t use the “Add new user form” on this page. Instead, you need to add them as a directory authenticated user, which is a separate item in the Users menu:

- You’ll see a form that looks much like the “Add existing user” form. Enter their username and choose their access level:

- As with the other form, you have the option not to send the automated email notification.
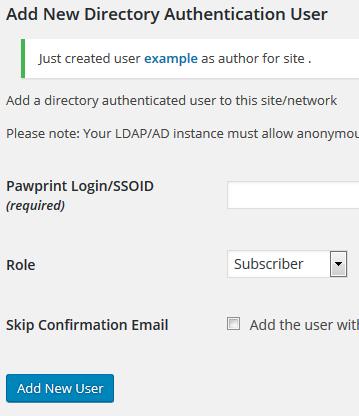
- Click the “Add New User” button, and you should see a message that the user has been created.

- At this point, you are finished. If you got an error, or anything strange happened during this process, or you have questions, then please contact Ron.

 or this: